What Are the Most Common Wire Bonding Failures?
Jul 23, 2026
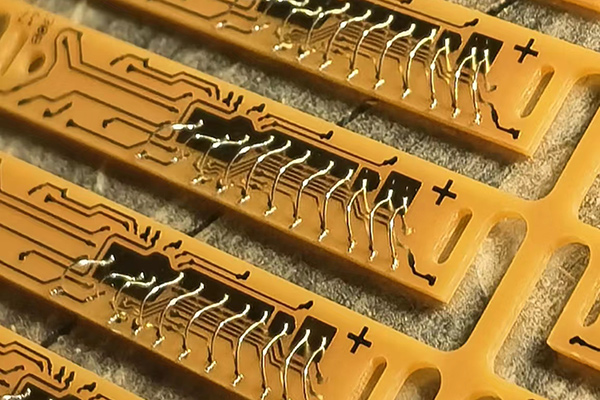
Wire bonding is one of the most widely used interconnection processes in semiconductor packaging. It creates the electrical path between a semiconductor die and a lead frame, substrate or package terminal. When the bond interface, wire loop or surrounding package structure is not properly controlled, defects may appear during production, reliability testing or field operation.
A package that fails after wire bonding does not necessarily indicate a single equipment problem. The root cause may involve surface condition, pad metallization, bonding wire, process parameters, tooling, substrate support or later packaging stress. Identifying the actual failure mode is therefore the first step toward an effective corrective action.
1. Common Wire Bonding Failure Modes
Bond Lift or Open Bond
Bond lift occurs when the ball bond or stitch bond separates from the pad, lead frame or substrate. It may be detected immediately by electrical testing, wire pull testing or visual inspection, but marginal bonds can also develop into intermittent or open circuits after thermal or mechanical stress.
Heel Crack and Wire Break
The heel is the transition area between the bonded wire and the free wire loop. Excessive deformation, an unsuit+able loop profile, tool geometry, repeated flexing or thermal cycling can initiate cracks in this area. A heel crack may grow until the wire becomes electrically open.
Pad Cratering or Metallization Damage
Excessive bonding force or ultrasonic energy can damage the bond pad, underlying dielectric or silicon structure. Typical results include pad peeling, aluminum splash, cratering below the pad or die cracking. These defects may not always be visible from the top surface and can require cross-section or acoustic analysis.
Ball, Stitch and Tail Formation Defects
Unstable electronic flame-off conditions, contaminated wire, worn capillaries or incorrect parameters can produce malformed free-air balls, off-center ball bonds, weak stitch bonds, short tails or non-sticks. These defects reduce process consistency and may increase rework or escape risk.
Loop Deformation and Wire Shorting
Incorrect loop height, span or trajectory can cause adjacent wires to touch each other or contact the package, die edge or mold compound. Wire sweep during molding is another possible source of short circuits, especially with long or fine wires.
2. Main Causes of Wire Bonding Failure
Surface Contamination and Oxidation
Organic residues, dust, fingerprints, silicone contamination and surface oxides can reduce the effective bonded area and prevent stable interfacial contact. Contamination may originate from incoming materials, die attach, cleaning agents, storage, handling or nearby processes. Because even a visually clean pad may carry molecular contamination, process control is more reliable than visual inspection alone.
An Unstable or Incorrect Bonding Process Window
Ultrasonic energy, bonding force, bonding time and stage temperature work together. Insufficient input can produce a small bonded area and weak interfacial formation. Excessive input may over-deform the wire, damage pad metallization, create heel cracks or cause cratering. The optimum settings depend on wire diameter and material, pad composition, package support, tool geometry and equipment condition.
Wire and Pad Material Compatibility
Gold, copper, palladium-coated copper, silver and aluminum wires differ in hardness, oxidation behavior and intermetallic formation. Copper wire, for example, generally requires a tighter process window because it is harder than gold and can place greater stress on the pad structure. Pad finish thickness, uniformity and storage condition also influence bondability and long-term reliability.
Capillary, Wedge and Equipment Condition
A worn, chipped or contaminated capillary or wedge can change bond shape and friction conditions. Variations in ultrasonic transducer performance, bond head calibration, wire clamps, EFO stability, heater temperature or Z-axis control can also create inconsistent results. Tool life should be managed through bond-count limits and quality trends rather than by appearance alone.
Thermo-mechanical Stress and Coefficient of Thermal Expansion (CTE) Mismatch
Mismatches in the coefficients of thermal expansion (CTE) among the chip, wire, pad, and moulding compound generate thermo-mechanical stress during temperature variations. The cyclic nature of this stress leads to thermal fatigue failure – cracks initiate and propagate, eventually causing signal degradation or open circuits. In power cycling and temperature cycling tests, wire bond detachment is a major life-limiting failure mode.
3. How to Improve Wire Bond Reliability
Control Surface Cleanliness
Define handling, storage and cleaning requirements for dies, lead frames and substrates. Plasma cleaning can remove many organic residues and activate selected surfaces before bonding, but gas type, power, treatment time and material compatibility should be validated. Over-processing may alter sensitive surfaces, so plasma cleaning should be treated as a controlled process rather than a universal setting.
Establish a Verified Process Window
Use designed experiments to evaluate ultrasonic energy, force, time and temperature together. The selected recipe should provide acceptable pull or shear strength, stable bond geometry and no pad damage across expected material and equipment variation. A center-of-window process is generally more robust than a recipe operating near a defect limit.
Maintain and Calibrate the Wire Bonder
Inspect capillaries, wedges, wire clamps, EFO components and ultrasonic transducers at defined intervals. Verify bond force, stage temperature, positioning accuracy and ultrasonic performance. Preventive maintenance records should be linked with defect trends to identify gradual drift before it causes yield loss.
Strengthen Incoming Material Control
Specify wire purity, diameter, mechanical properties, reel storage and shelf life. Check pad finish, metallization thickness, lead-frame condition and substrate cleanliness. Material substitutions should undergo bonding trials and reliability verification rather than being released on dimensional equivalence alone.
Use In-Process Inspection and Statistical Monitoring
Combine visual or automated optical inspection with wire pull, ball shear or bond shear testing as appropriate. Track bond dimensions, failure modes, pull or shear results, non-stick events and tool usage through statistical process control. Monitoring trends is more effective than relying only on final pass/fail inspection.
Match Corrective Action to the Failure Mode
Do not increase ultrasonic power or force automatically when a weak bond is found. First identify where and how the bond failed. Optical microscopy, pull-test failure classification, scanning electron microscopy, cross-sectioning, elemental analysis and acoustic imaging may be used depending on the defect. Corrective action should target the confirmed mechanism.
4. Quick Troubleshooting Guide
Observed Defect
Possible Causes
Recommended Checks
Bond lift / non-stick
Contamination; insufficient bonded area; poor pad finish; worn tool
Review failure surface; check cleaning and storage; inspect tool; verify pull/shear data and process window
Heel crack / wire break
Excessive deformation; unsuitable loop; tool geometry; thermal fatigue
Inspect heel shape; review loop program and bond parameters; compare initial and aged samples
Pad damage / cratering
Excessive force or ultrasonic input; weak pad stack; inadequate support
Cross-section or acoustic inspection; verify force calibration; review pad design and workholder support
Malformed ball / unstable bond
EFO variation; contaminated wire; capillary wear; gas or gap instability
Check FAB geometry, EFO electrode, forming-gas conditions, wire path and capillary condition
Wire short / sweep
Loop too low or long; placement error; molding flow
Measure loop profile and spacing; verify alignment; review mold process and wire sweep after molding
5. Conclusion
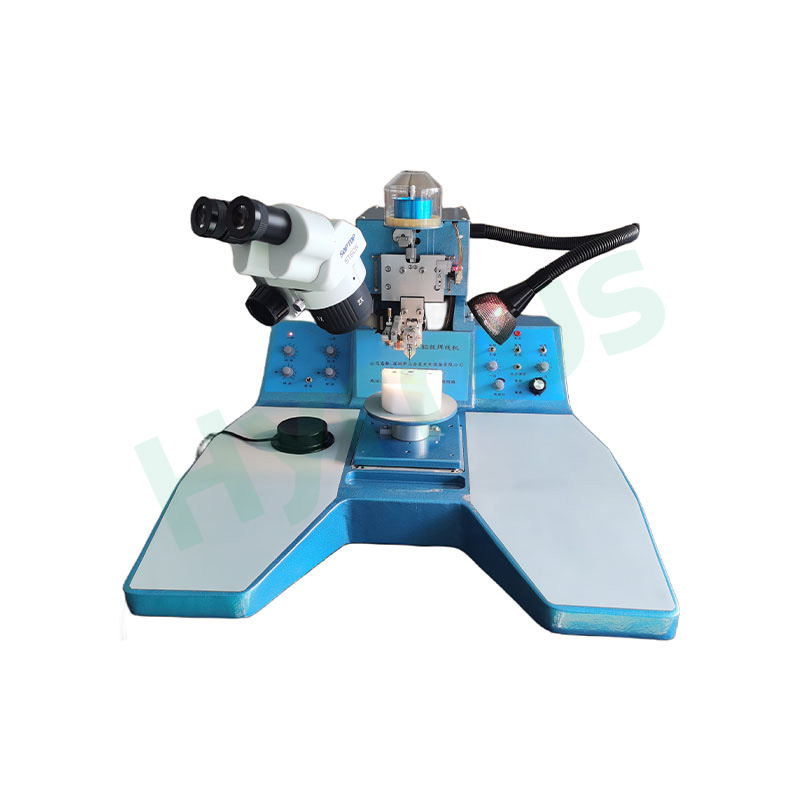
Wire bonding failures often result from the combined effects of bonding materials, surface conditions, process parameters, tooling performance and subsequent packaging stress. Effective improvement starts with identifying the specific failure mode, followed by controlled surface cleaning, process-window optimization, routine equipment maintenance and data-based inspection. Selecting reliable wire bonding equipment with stable ultrasonic output and precise parameter control also helps improve bonding consistency and reduce recurring defects.
HYRNUS provides wire bonding, plasma surface treatment and bond-testing solutions for semiconductor packaging applications. Whether you are developing a new product, upgrading an existing process or troubleshooting repeated bonding defects, our engineers can evaluate the package structure, wire and pad materials, production requirements and inspection methods before recommending a suitable equipment configuration. Please contact our team for technical consultation and equipment recommendations.
FAQ
What is the most common cause of wire bond lift?
There is no single universal cause. Surface contamination, inadequate interfacial formation, pad-finish problems and worn bonding tools are frequent contributors. The fracture location and failure surface should be examined before adjusting the recipe.
Can plasma cleaning prevent wire bonding defects?
Plasma cleaning can improve bondability when organic contamination or poor surface activation is involved. It cannot correct pad-design problems, damaged metallization, unsuitable wire-pad combinations or incorrect bonding parameters.
How are wire bond defects detected?
Common methods include visual or automated optical inspection, electrical test, wire pull testing, ball or bond shear testing and statistical monitoring. More complex failures may require microscopy, cross-sectioning, elemental analysis or acoustic imaging.
How often should a wire bonding capillary be replaced?
Replacement intervals depend on wire material, bond count, package type, cleaning practices and quality trends. Manufacturers should define tool-life limits using inspection data and process performance instead of applying one fixed interval to every product.